How To Make Artisan Sourdough Bread

Last modified: March 4, 2026
This post will teach you, step-by-step, how to make delicious Artisan Sourdough Bread. Making homemade sourdough bread is within your reach in a few easy steps!


Why You Will Love This Recipe
- The recipe and instructions are step-by-step and easy to follow.
- The recipe yields a delicious, crusty, tasty, consistent sourdough bread.
- You do not need a mixer to make this recipe.
Once I learned how to make artisan sourdough bread, I couldn’t believe how easy it was. The dough is mixed in a bowl without a mixer, it rests, you give it a few lifts and turns, pop it in the fridge over night and then you’re ready to bake!
All you need to make this bread is a good, active sourdough starter, all-purpose and rice flours, some water and salt. Your kitchen will be smelling like baked bread in no time!

Ingredients
- all-purpose flour
- sourdough starter
- water
- fine sea salt
- rice flour (optional)
- uncooked rice (optional, to cover the bottom of your Dutch oven to keep bread from getting too brown on the bottom.)
See recipe card for quantities.
Instructions


Step 1: Add water and sourdough starter to a large mixing bowl.
Step 2: Whisk the water and sourdough starter together until it looks cloudy.
Step 3: Add the all-purpose flour and mix with your hands or a dough whisk until no dry spots remain. The dough will look shaggy.
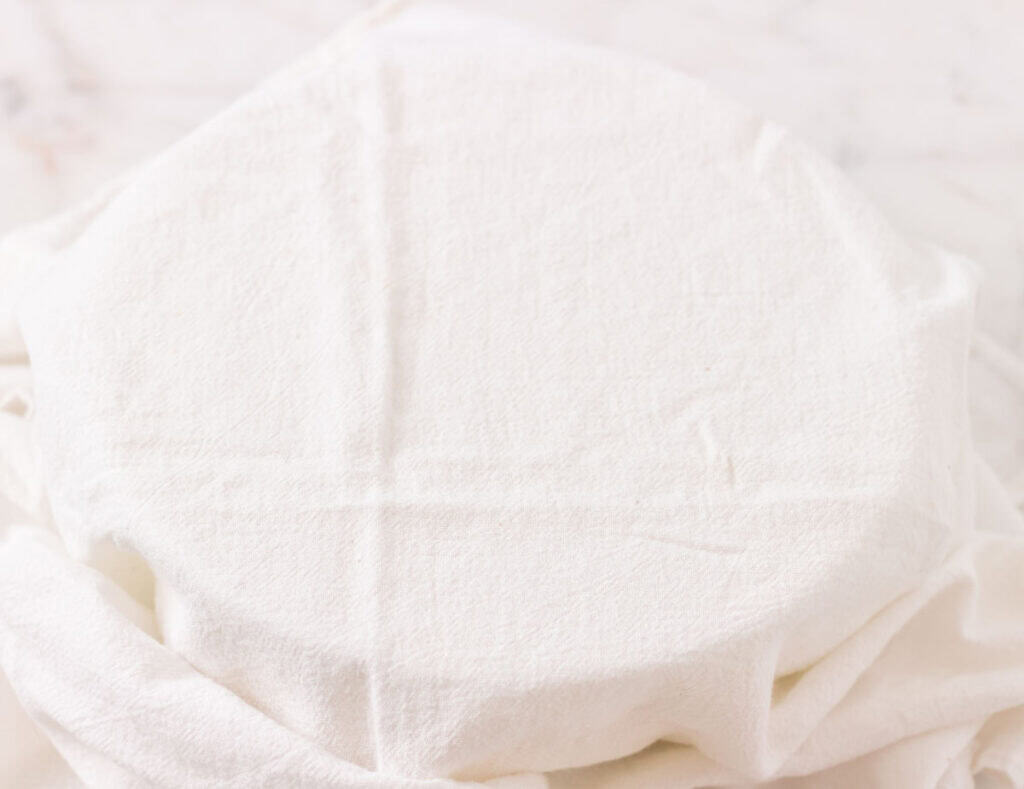
Step 4: Cover bowl with a tea towel and let rest for 20-30 minutes on your counter.


Step 5: Sprinkle the salt over the dough and gently work it in by pinching and folding until incorporated.


Step 6: After the salt is incorporated into the dough, then we start stretch and folds.
Stretch and Folds – Over the next 2-2 1/2 hours, perform 3-4 stretch-and-folds (every 30-40 minutes). This technique builds gluten and strengthens the dough. This method replaces heavy kneading while slowly preserving air and structure. It also creates an airy crumb and doesn’t overwork the dough.
- Uncover the bowl and with slightly wet hands, lift the dough by stretching it up (without tearing it) then fold it over to the center.
- Rotate the bowl a quarter of a turn and repeat until all four sides have been stretched and folded.
- Cover bowl with a tea towel and let the dough rest for 30-40 minutes at room temperature, ideally in a warm spot. Repeat this three more times.
The dough will become smoother, stronger and a little puffy with each fold.


Step 7: After the last stretch and fold, cover bowl with a tea towel and let rest for 30-60 minutes at room temperature until slightly puffy before shaping. We are looking for visible air bubbles and a little jiggle to the dough. (Dough does not need to double in size.)


Step 8: Generously flour (rice flour) a Banneton (proofing basket) or line a large bowl with a tea towel and flour generously, especially the grooves, if you’re not using the liner. You can rub it into the basket with your hands to really get it in there. (I used a liner in my Banneton basket, but you don’t have to, especially if you like the pretty rings you get by using the Banneton.) Tap out the excess flour.
Why rice flour? The simple answer is, rice flour doesn’t absorb water the way wheat flour does. There is less risk of sticking, especially because this recipe calls for proofing overnight. Also, the rice flour bakes off clean and doesn’t leave a gummy residue.


Step 9: Turn dough out and onto a lightly floured (rice flour) cutting board.
Step 10: Shape the dough into a boule (round loaf).
- Fold the bottom edge up to the middle.
- Fold the left side over the right, about two-thirds across.
- Fold the right side over the left, about two-thirds across.
- Fold the top edge down to meet the middle.
- Flip the dough over so the seam is on the counter. Cup your hands around the dough and gently pull it towards you in a circular motion, creating surface tension by dragging the dough slightly on the board.
- Rotate and repeat a few times until it feels taut. (It doesn’t have to be perfect. As long as it is roughly round, it will bake up nicely. You’ve got this!)


Step 11: Place your shaped dough seam side up (ugly side up) directly into the basket or lined bowl.
Step 12: Cover your basket with plastic wrap and a tea towel and place into a plastic bag. (Not pictured.)
Step 13: Refrigerate for 8-12 hours, or overnight.
Step 14: Preheat oven with Dutch oven (covered) inside to 475°F for 30-45 minutes.


Step 15: Turn dough out onto a piece of parchment paper. Lightly dust with rice flour again.


Step 16: Using a lame or a razor blade, hold at a slight angle and gently score the surface of the dough with a quick motion.
I do one large horizontal line and then one vertical. This helps the bread to expand in the oven.
Then you can do some pretty designs of your choice if you want to. You can use your imagination or there are plenty of ideas online.


Step 17: When your oven and Dutch oven are preheated, remove the Dutch oven. I like to add some uncooked rice to the bottom of mine to keep the bread from getting too brown on the bottom. Carefully lift the parchment and drop your dough into the Dutch oven.

Step 18: Cover Dutch oven and bake for 25 minutes. Then remove the lid and bake 15-20 minutes more, until the bread is a deep golden brown. (I use a digital thermometer and remove my bread when the temperature reaches 205-210°F. See hint below for temperature guidelines.)
If you think your bread is getting too dark, you can place a foil tent over the Dutch oven.
Step 19: Remove bread from oven. Let bread cool in Dutch oven for 10 minutes and then carefully remove and cool for 1 hour on a cooling grid.
Step 20: Using a bread knife or a serrated knife, slice bread into 8 even slices (you can slice more or less, depending on how thin or thick you like your bread) using a gentle sawing motion, holding the loaf steady, but not pressing down.
Enjoy!
Hint: Depending how you prefer your bread, here are some guidelines for the internal temperature. (If your bread is browning too fast, you can lower the temperature 10-15°F during the bake, or cover loosely with foil for the last 10-15 minutes.)
Fully baked: 205-210°F
Soft, lighter crust: aim closer to 200-205°F
Very firm, classic artisan crust: closer to 210°F
Variations
- Before shaping, you can knead in herbs, spices, seeds, dried fruit or cheese.
- After shaping, on top of the bread, you can add seeds, oats or course salt.
Equipment
- Dutch oven
- large bowl
- large wooden spoon or dough whisk
- measuring cups and spoons or a kitchen scale (most accurate)
- Banneton basket (optional, you can also use a bowl lined with a tea towel)
- bench scraper (optional, it helps move your dough around while shaping)
- bread lame or razor blade
- bread knife
Storage
- Store baked sourdough bread in a paper or cloth bag, or a bread box for 2-3 days. This allows it to breathe.
- You can freeze baked sourdough bread (sliced) in an airtight freezer bag for up to 3 months. Refresh bread in the oven to restore the crust after it has defrosted.
- Avoid putting your sourdough bread in the refrigerator to avoid dryness.
Freezing – dough can be frozen after shaping and before putting in the refrigerator overnight. Place dough on a tray lined with parchment paper and freeze until solid, about 1-2 hours. Once the dough is frozen, wrap it tightly in plastic wrap and then in a freezer-safe bag. Can be frozen for up to 2 months.
When you are ready to bake your bread, remove the dough from the freezer and place it in a floured banneton or bowl lined with a floured tea towel. Cover the dough and let it thaw and rise at room temperature until slightly puffy, about 4-6 hours. Then bake as directed.
Top Tips
- Use rice flour in your banneton or tea towel/bowl to keep the dough from sticking.
- Don’t overshape your dough. Aim for a gentle round and not a tight ball.
- Lightly dust your dough before scoring.
- Use a sharp blade or lame to score.
- Let the bread cool for 1 hour before slicing.
Related
For instructions on how to make your own sourdough starter, see my post on How To Make Sourdough Starter.
Looking for other bread recipes? Visit my breads, buns and rolls page!

How To Make Artisan Sourdough Bread
- Dutch oven
- large bowl
- large wooden spoon or dough whisk
- measuring cups and spoons or a kitchen scale (most accurate)
- Banneton basket (optional, you can also use a bowl lined with a tea towel)
- bench scraper (optional, it helps move your dough around while shaping)
- bread lame or razor blade
- bread knife or large serrated knife
- 4 cups (480g) all-purpose flour
- 1/2 cup (100g) active sourdough starter
- 1 1/2 cups (360g) water (room temperature)
- 1 1/2 teaspoons (9g) fine sea salt
- rice flour (Optional, for dusting)
- rice (Optional, to cover the bottom of your Dutch oven to keep bread from getting too brown on the bottom.)
- Add water and sourdough starter to a large mixing bowl.
- Whisk the water and sourdough starter together until it looks cloudy.
- Add the all-purpose flour and mix with your hands or a dough whisk until no dry spots remain. The dough will look shaggy.
- Cover bowl with a tea towel and let rest for 20-30 minutes on your counter.
- Sprinkle the salt over the dough and gently work it in by pinching and folding until incorporated.
- After the salt is incorporated into the dough, then we start stretch and folds.
Stretch and Fold – Over the next 2-1/2 hours, perform 3-4 stretch-and-folds (every 30-40 minutes).
- Uncover the bowl and with slightly wet hands, lift the dough by stretching it up (without tearing it) then fold it over to the center.
- Rotate the bowl a quarter of a turn and repeat until all four sides have been stretched and folded.
- Cover bowl with a tea towel and let the dough rest for 30-40 minutes at room temperature, ideally in a warm spot. Repeat this three more times. The dough will become smoother, stronger and a little puffy with each fold.
- After the last stretch and fold, cover bowl with a tea towel and let rest for 30-60 minutes at room temperature until slightly puffy before shaping. We are looking for visible air bubbles and a little jiggle to the dough. (Dough does not need to double in size.)
- Generously flour (rice flour) a Banneton (proofing basket) or line a large bowl with a tea towel and flour generously, especially the grooves, if you’re not using the liner. You can rub it into the basket with your hands to really get it in there. (I used a liner in my Banneton basket, but you don’t have to, especially if you like the pretty rings you get by using the Banneton.) Tap out the excess flour.
Shape the dough into a boule (round loaf).
- Turn dough out and onto a lightly floured (rice flour) cutting board.
- Fold the bottom edge up to the middle.
- Fold the left side over the right, about two-thirds across.
- Fold the right side over the left, about two-thirds across.
- Fold the top edge down to meet the middle.
- Flip the dough over so the seam is on the counter. Cup your hands around the dough and gently pull it towards you in a circular motion, creating surface tension by dragging the dough slightly on the board.
- Rotate and repeat a few times until it feels taut. (It doesn’t have to be perfect. As long as it is roughly round, it will bake up nicely. You’ve got this!)
- Place your shaped dough seam side up (ugly side up) directly into the basket or lined bowl.
- Cover your basket with plastic wrap and a tea towel and place into a plastic bag. (Not pictured.)
- Refrigerate for 8-12 hours, or overnight.
Bake
- Preheat oven with Dutch oven (covered) inside to 475°F for 30-45 minutes.
- Dust dough with rice flour again.
- Using a lame or a razor blade, hold at a slight angle and gently score the surface of the dough with a quick motion. I do one large horizontal line and then one vertical. This helps the bread to expand in the oven. Then you can do some pretty designs of your choice if you want to. You can use your imagination or there are plenty of ideas online.
- When your oven and Dutch oven are preheated, remove the Dutch oven. I like to add some uncooked rice to the bottom of mine to keep the bread from getting too brown on the bottom. Carefully lift the parchment and drop your dough into the Dutch oven.
- Cover Dutch oven and bake for 25 minutes. Then remove the lid and bake 15-20 minutes more, until the bread is a deep golden brown. (I use a digital thermometer and remove my bread when the temperature reaches 205-210°F. See hint below for temperature guidelines.)If you think your bread is getting too dark, you can place a foil tent over the Dutch oven.
- Remove bread from oven. Let bread cool in Dutch oven for 10 minutes and then carefully remove and cool for 1 hour on a cooling grid.
- Using a bread knife or a serrated knife, slice bread into 8 even slices (you can slice more or less, depending on how thin or thick you like your bread) using a gentle sawing motion, holding the loaf steady, but not pressing down.
- Enjoy!
Hint
- Depending how you prefer your bread, here are some guidelines for the internal temperature. (If your bread is browning too fast, you can lower the temperature 10-15°F during the bake, or cover loosely with foil for the last 10-15 minutes.)Fully baked: 205-210°FSoft, lighter crust: aim closer to 200-205°FVery firm, classic artisan crust: closer to 210°F

There is something so satisfying about making something from scratch with your own hands. You also know all of the ingredients that are going into the bread you are making for you and your family.
Once you learn how to make artisan sourdough bread, I hope you will be inspired to make more recipes from scratch. I hope you enjoy this recipe. I would love to hear from you.
Sweet regards,
Michele